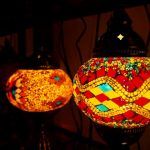
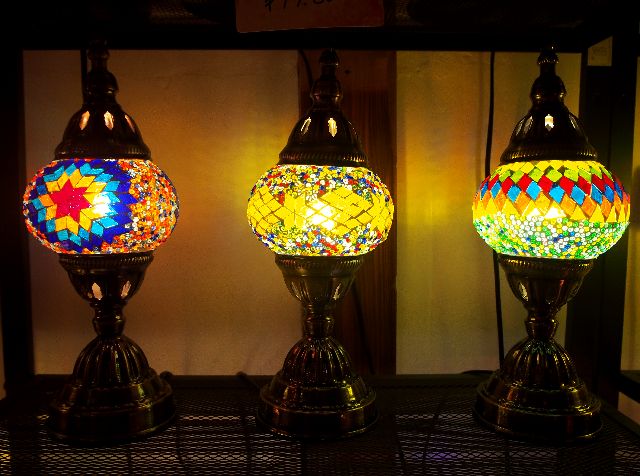
Kawagoe-Ichibangai-Shotengai is known as a brewery townscape. If you take a short walk from the main street to a narrow alley, you may find an unexpected wonderful shop.
The Turkish general store “Turkey Bazaar” introduced here is one of them!
You can make an original Turkish lamp here, so let’s try.
Writer: Kana Kanoe
Japanese
-

-
川越「トルコバザール」でトルコランプ作り体験!世界にひとつの作品を
続きを見る
目次
Turkish Bazaar in Kawagoe, brewery townscape
The main sightseeing spot in Kawagoe is the streets of kurazukuri, Kawagoe- Ichibangai-Shotengai. This area has been selected as one of the country's “preservation districts for important traditional buildings” and “100 beautiful Japanese historical climates”.
The Turkish Bazaar store is located on the right side of kurazukuri street. The landmark is the orange building on the left side of the photo.
Located at the back of a narrow alley, lined with traditional buildings ...
Let's go to the back alley with a retro building that has brilliant color on the right-hand side of kurazukuri storehouses.
Turkey Bazaar is located at the very back of the building.
Turkish flag and miscellaneous goods are lined up at the entrance of the store. They match well with Japanese retro architecture.
Let’s go inside!
Now, let’s go into the store!
The Turkish bazaar is a two-story store, and on the first floor, there is a workshop for making Turkish lamps and a shop for Turkish goods.
In the store, tableware, sparkling chai glass, accessories, and perfume bottles like magic lamps were lined up one by one.
Looking up at the ceiling you will see many Turkish lamps!
It’s already exciting, but if you want more fun, you must also visit the second floor to make a Turkish lamp!
The second floor has a fantastic Turkish lamp sales area
As a traditional building, the staircase is a steep structure reminiscent of the good old days of Japan. I’m getting excited while going up…….
Turkish lamps are all over the room! It is so colorful and quite magical.
There may be people who have trouble choosing colors when making Turkish lamps. It is recommended that you enter the store a little earlier than the start time to explore the lamp section on the second floor.
Let’s look at all the Turkish lamps, and enjoy the color moods.
Let’s start making Turkish lamps at Turkish Bazzar!
After looking around inside the Turkish Bazaar store, it ’s time to start making a Turkish lamp.
Price and time required for making Turkish lamps
*Price as of November 2019.
Turkish lamps can be selected from three sizes. The charges are as follows.
| Size | Price (tax included) |
| S size | 6,500 yen |
| M size | 8,000 yen |
| L size | 9,500 yen |
Approximate size of S size: About the width of the thumb, to pinky of an adult woman’s open palm. This is just the right size to put next to the bed.
The M size is 1.5 to 2 times bigger than the S size, and the L size is about 3 times bigger than the S size. No matter what size you choose, the lampstand height will not change much.
They are all not overly too big or too small, so they can be casually incorporated into the interior of the room.
The estimated time required for making a Turkish lamp is 2 hours. However, it may take more time if you have trouble choosing a color.
By the way, it took me about 2 hours and 40 minutes. The Master was a very kind and fun person, so we were chatting away…....
Which one? A star pattern, or a strip pattern?
This time I decided to make an M size Turkish lamp.
Lined up on the table are diamond-shaped colorful Turkish glass.
There are two main patterns: the star pattern “Yulduz” (in the back of the photo), which means “eternally shining stars”, and vertical and horizontal strips (in front). If you look closely, there are also small stars in the strip pattern.
I chose a star pattern. Place the glass on the paper with the guided line and make a pattern.

However, I'm struggling with clumsy hands ... But don't worry. The Master will help you carefully when you have a problem. As shown in the picture, I was able to make a big star pattern.
To attach the glass to the lamp

Once you have the pattern, take the glass one by one with tweezers and paste it onto the lamp.
The Master will apply the adhesive and show you how to paste it. Adhesives are not quick-drying so you don’t need to be scorched.

The process of attaching the glass to the lamp is mindlessness and fun. Finally, the master checks your lamp and makes some adjustments.
Let’s choose a belt-like mosaic to attach on the top and bottom of the lamp

Next comes the square Turkish glass! Paste these on top and bottom of the lamp.

First, create an image by arranging the glass on a guided paper. Of course, you can choose your favorite color as you like.
I planned to make a lamp with mainly blue this time, but I also added red as an effect color.

The point is to stick them with a little gap. The Master makes adjustments here too.
Add some extra decorations if you wish

Up to this point, the process of pasting Turkish glass is completed, but you can add some extra decorations if you wish.
This time, we will decorate with a large diamond pattern that combines four diamond-shaped Turkish glass.
The adhesive was applied by the master. Gently paste the Turkish glass, so that it is in the middle of the star pattern!
Once the beads are laid out, the Turkish lamp is complete!

The cute spoon is also Turkish goods
We will be using beads as the last is decoration
When I specified the color I wanted to use from among the colorful beads, the master took it with a spoon and mixed it.

Apply some beads with a spoon on the adhesive applied to the glass and stick it carefully to the glass by pushing or pinching it with your fingers.

Now it's complete after applying some beads!
However, you can not take the Turkish lamp home on the day.
After completing the lamp, the Master dries the lamp, attaches the foundation and finishes it neatly.
The Turkish lamp will be completed in a few days up to a week later. As for receiving methods, you can choose either coming back to the store or delivery.
I live in the neighborhood and I also want to see my Turkish lamp as soon as possible, so I decided to pick it up at the store.
Picking up the finished Turkish lamp
A few days later, I visited the Turkish Bazaar again.
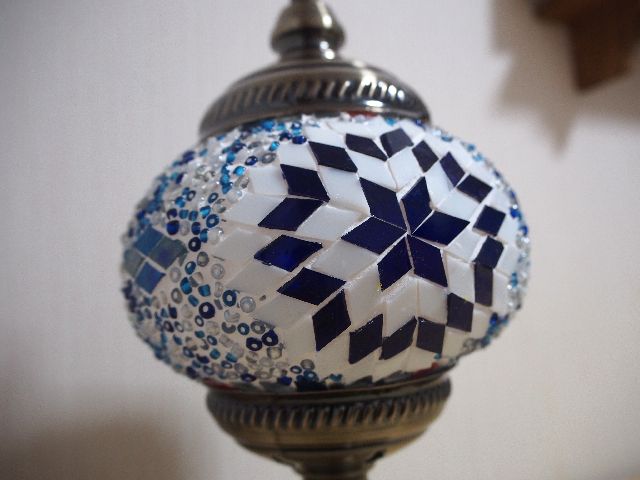
The Turkish lamp I received is filled with plaster in the gap between beads and Turkish glass. Also, the stand was applied on the spot.
As soon as I turned the light on …...
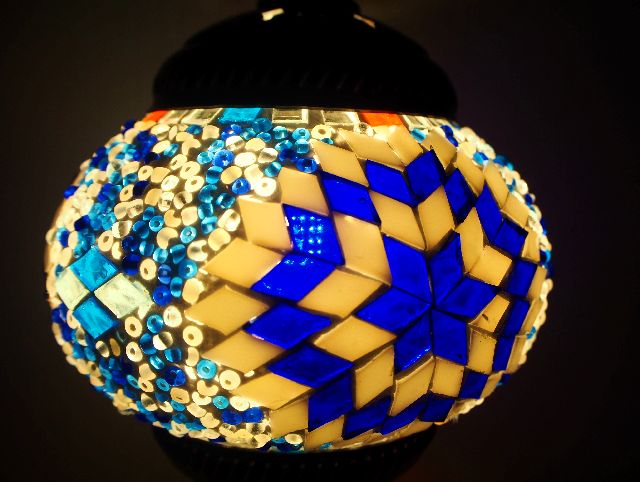
The Turkish glass and beads began to shine with slight orange. My excitement was to the max!
For its beauty, I was in awe saying “Wow, beautiful!”. I really love the Turkish lamps I made!
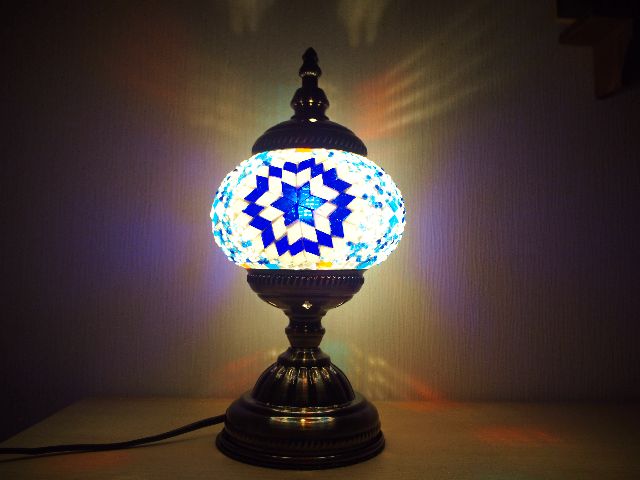
Picture of my finished Turkish lamp
The switch is attached to the cord, so you can easily turn it on and off.
The colorful light reflected on the wall is one of the highlights of Turkish lamps. If you look down from above, the light is reflected on the floor as well.
In order to enjoy this reflection, it is recommended to place it near the white wall. Also, when choosing the first glass, it is better to choose a darker color and a lighter color to add clarity to the hue.
Please refer to this color scheme when you make your lamp.
Even beginners can enjoy the Turkish lamp making experience

The Turkish lamp making experience at Turkish bazaar is a small group (1 to 4 people), so each individual can be taught carefully.
Even if you are a beginner at making Turkish lamps like me, and your hands are clumsy, you can still have fun!
Of course you can participate as a group or you can try on your own. There may still be some interactions between participants.

When I was making the lamp, a customer who had a close look at the Turkish lamps fell in love at first sight, so they decided to participate in making a Turkish lamp on the spot.
Sometimes, you can just jump into the Turkish lamp making experience, but it is recommended that you make a reservation in advance.
The Turkish Bazaar is a place where many people are gratified. Including those who are interested in Turkish lamps and Turkish miscellaneous goods, those who want to make memories of their unforgettable trips, and those who love the country of Turkey and want to enjoy talking with the Master.
Please try and make a Turkish lamp!
Click here for other customers works!
Access to Kawagoe, Turkish Bazaar
- Access by car
Approximately 15 mins from Kanetsu-Jidoshado “Kawagoe IC.” Coin Parking is available about a 2 mins walk. - Access by public transportation
Get off at Tobutojyo line, JR Kawagoe line Kawagoe station, get on the Tobu bus (Kawagoe 01-04, Waka 02 ect) 2 mins walk from the Ichibangai bus stop


